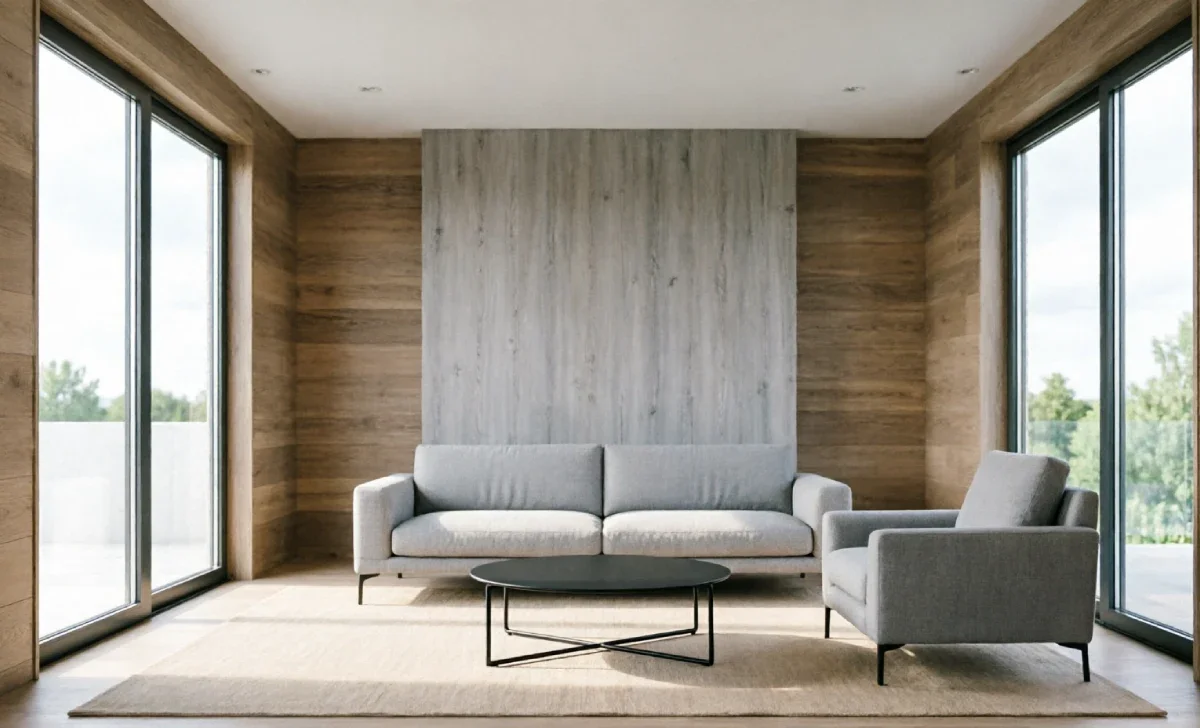
Are you looking for an affordable way to transform your living space? Laminate flooring on walls has become one of the most popular interior design trends in 2026, offering the luxurious look of wood paneling at a fraction of the cost.
This innovative approach allows homeowners to create stunning accent walls, add warmth to modern spaces, and increase property value without breaking the bank. Whether you're planning a bedroom makeover, bathroom update, or living room refresh, laminate walls deliver professional results with DIY-friendly installation.
In this comprehensive guide, you'll discover the latest design ideas, step-by-step installation instructions, and current 2026 pricing to help you plan your project. If you're exploring different materials for your home renovation, check out our guide to the best home flooring options to understand why laminate remains a top choice for both floors and walls in 2026.
Why Choose Laminate Flooring for Walls?
Laminate flooring has evolved beyond traditional floor applications. In 2026, homeowners and designers are recognizing its versatility for wall installations. Here's why this trend continues to dominate:
Cost-Effective Solution: Laminate wall panels cost 60-70% less than traditional wood paneling while delivering similar aesthetics. You get the high-end look without the premium price tag.
Durability That Lasts: Modern laminate features advanced wear layers that resist scratches, fading, and moisture. When installed on walls (where there's less wear than on floors), laminate can last 20-30 years with minimal maintenance.
Easy Maintenance: Unlike textured wallpaper or fabric panels, laminate wipes clean with a damp cloth. No special cleaners, sealing, or refinishing required—perfect for busy households.
Quick Installation: Most DIY enthusiasts can complete a standard accent wall in 1-2 days. The click-lock and tongue-and-groove systems make installation straightforward, even for beginners.
Moisture Resistance: Waterproof and water-resistant laminate options work beautifully in bathrooms, kitchens, and high-humidity areas where traditional materials would fail.
Design Versatility: With hundreds of colors, patterns, and textures available in 2026, you can achieve anything from rustic farmhouse charm to sleek modern minimalism.
15 Stunning Laminate Wall Ideas for 2026
Living Room Transformations
1. Horizontal Accent Wall: Install light oak or gray laminate horizontally behind your sofa. This creates visual width and makes smaller rooms feel more spacious—a top trend in 2026.
2. Vertical Drama: Draw the eye upward with vertical planks in rooms with high ceilings. Dark walnut or espresso tones add sophistication and modern appeal.
3. Herringbone Pattern: For luxury appeal, install planks in a herringbone pattern behind media centers or fireplaces. This geometric design adds architectural interest.
4. Two-Tone Design: Combine light and dark laminate for a contemporary geometric accent wall. Try natural oak paired with charcoal for striking contrast.
Bedroom Makeovers
5. Headboard Feature Wall: Extend laminate from floor to ceiling behind the bed. Add integrated LED lighting for a hotel-luxe atmosphere that's incredibly popular in 2026.
6. Coastal Vibes: Create a beachy aesthetic with whitewashed or light gray horizontal planks. Perfect for master bedrooms and guest rooms seeking tranquility.
7. Vertical Installation: Make standard 8-foot ceilings appear taller with vertical installation. Choose light tones to maximize the height-enhancing effect.
Bathroom & Kitchen Applications
8. Waterproof Shower Walls: Use waterproof laminate for spa-like shower surrounds. Seal edges with silicone caulk for complete moisture protection.
9. Vanity Backsplash: Install moisture-resistant laminate behind sinks. It's easier to clean than tile grout and looks incredibly contemporary.
10. Kitchen Backsplash: Skip expensive tile and use laminate for a seamless backsplash. It installs in hours instead of days and costs significantly less. For kitchens with dark cabinetry, explore dark flooring kitchen ideas to create a cohesive, dramatic look that's trending in 2026.
11. Island Accent: Wrap your kitchen island in laminate for a built-in appearance. Choose a contrasting color to make it stand out.
Creative Applications
12. Staircase Wall: Install laminate on the wall alongside the stairs for a continuous design element that guides the eye upward.
13. Home Theater: Create acoustic interest with dark laminate walls. Add soundproofing insulation behind planks for better acoustics.
14. Entryway Statement: Make a strong first impression with laminate in your foyer. Add hooks and a bench for a functional mudroom setup.
15. Office Accent Wall: Boost productivity and style with a laminate feature wall in your home office. Choose warm tones for coziness or cool grays for focus.
Step-by-Step Installation Guide
Installing laminate flooring on walls is easier than you might think. Follow these proven steps for professional-looking results in 2026.
Tools & Materials You'll Need
Essential Tools:
- Laser level or 4-foot level
- Tape measure and pencil
- Stud finder
- Brad nailer (18-gauge)
- Caulk gun
- Circular saw or table saw
- Miter saw
- Utility knife
- Safety goggles and work gloves
Materials:
- Laminate planks (without attached underlayment)
- Construction adhesive (Liquid Nails or equivalent)
- 1-1/2 inch brad nails
- Silicone caulk (color-matched)
- Finishing trim or molding
- Wood filler
Preparation Phase (Day 1)
Step 1: Acclimate the Laminate. Bring laminate planks into the installation room 48 hours before starting. This prevents expansion or contraction after installation—a critical step many DIYers skip.
Step 2: Calculate Materials. Measure your wall's square footage and add 10% for waste and cuts. For a standard 10x8 foot wall (80 sq ft), order enough for 88 sq ft.
Step 3: Prepare the Wall Surface
- Remove outlet covers, switch plates, and existing trim
- Clean the wall thoroughly
- Repair major drywall damage
- Ensure the wall is completely dry
Step 4: Locate Wall Studs. Use a stud finder to locate wall studs. Mark each stud location with a pencil from floor to ceiling. Studs are typically spaced 16 or 24 inches apart—this is where you'll secure the planks.
Installation Process (Day 2)
Step 5: Create a Level Starting Line. Use a laser level to draw a perfectly horizontal line where your first row will go. Never assume your floor or ceiling is level—it rarely is.
Step 6: Cut First Row Planks. Measure and cut planks to fit your wall width. Stagger seams by at least 6 inches between rows for visual appeal and structural stability.
Step 7: Apply Construction Adhesive. Run a bead of construction adhesive in a zigzag pattern on the back of each plank. Don't skip the adhesive—nails alone won't provide long-term holding power.
Step 8: Position the First Plank. Align the first plank with your level line and press firmly against the wall for 30 seconds to set the adhesive.
Step 9: Secure with Brad Nails. Using a brad nailer, drive 1-1/2 inch nails through the tongue (the part that will be covered by the next row) at each stud location. Space nails every 8-12 inches for maximum security.
Step 10: Continue Row by Row
- Click or fit the next plank into place
- Apply adhesive to the back
- Press firmly against the wall
- Nail through the tongue at stud locations
- Use a tapping block to ensure tight seams
- Stagger end joints between rows
Step 11: Cut Around Outlets and Switches
- Turn off the power at the breaker
- Measure outlet locations carefully
- Cut openings with a utility knife or jigsaw
- Leave 1/8 inch gap around outlets for expansion
Step 12: Install the Final Row. Measure the remaining space and rip planks to width. You may need to remove the tongue from the final row to achieve a proper fit.
Step 13: Add Trim and Molding. Install quarter-round or finishing trim at ceiling and floor lines. This covers expansion gaps and creates a polished, professional appearance.
Step 14: Caulk All Edges. Apply color-matched silicone caulk around outlets, switches, and trim edges. This prevents moisture intrusion and gives a finished appearance.
Step 15: Final Cleanup
- Remove any adhesive residue immediately
- Fill nail holes with color-matched wood filler
- Wipe down the entire wall with a damp cloth
- Reinstall outlet covers and switch plates
2026 Cost Breakdown
Understanding the true cost helps you budget accurately. Here's what to expect in 2026:
Material Costs
| Item | Cost | Details |
|---|---|---|
| Laminate planks | $25-$55 per panel | Depends on brand, thickness, and AC rating |
| Construction adhesive | $10-$18 per tube | One tube covers 10-15 panels |
| Brad nails | $12-$22 per box | 1,000 nails per box |
| Silicone caulk | $6-$12 per tube | 2-3 tubes for an average wall |
| Trim/molding | $3-$10 per linear foot | Optional but recommended |
Total Materials (100 sq ft): $350-$900 for DIY installation
Professional Labor Costs
If hiring a professional installer in 2026:
- Labor rate: $45-$75 per hour
- Typical timeframe: 8-16 hours for 100 sq ft
- Total labor cost: $550-$1,600
Total Project Comparison
| Installation Type | Cost Per Sq Ft | 100 Sq Ft Total |
|---|---|---|
| DIY Laminate Wall | $3.50-$9 | $350-$900 |
| Professional Install | $9-$16 | $900-$1,600 |
| Traditional Wood Paneling | $12-$28 | $1,200-$2,800 |
| Tile Installation | $18-$45 | $1,800-$4,500 |
Money-Saving Tips for 2026:
- Buy during seasonal sales (20-40% off, common)
- Choose in-stock colors to avoid special order fees
- DIY installation saves $550-$1,600 on average
- Purchase remnants for small accent walls
Maintenance & Care
Laminate walls require minimal upkeep, but proper care extends their lifespan:
Weekly Cleaning:
- Dust with a microfiber cloth
- Vacuum with a soft brush attachment
- Wipe fingerprints with a slightly damp cloth
Monthly Deep Cleaning:
- Mix mild dish soap with warm water
- Dampen (don't soak) a microfiber cloth
- Wipe in the direction of the planks
- Dry immediately with a clean cloth
Avoid:
- Excess water or steam cleaning
- Abrasive scrubbers or harsh chemicals
- Wax-based or oil-based cleaners
Annual Inspection:
- Check for loose planks or nails
- Inspect caulk around edges
- Look for moisture damage in bathrooms
- Tighten any loose trim
Final Thoughts
Laminate flooring on walls is more than just a trend—it's a practical, affordable way to transform your home in 2026. With costs starting at just $350 for DIY projects and installation that most homeowners can complete in a weekend, it's no wonder this technique continues to dominate interior design.