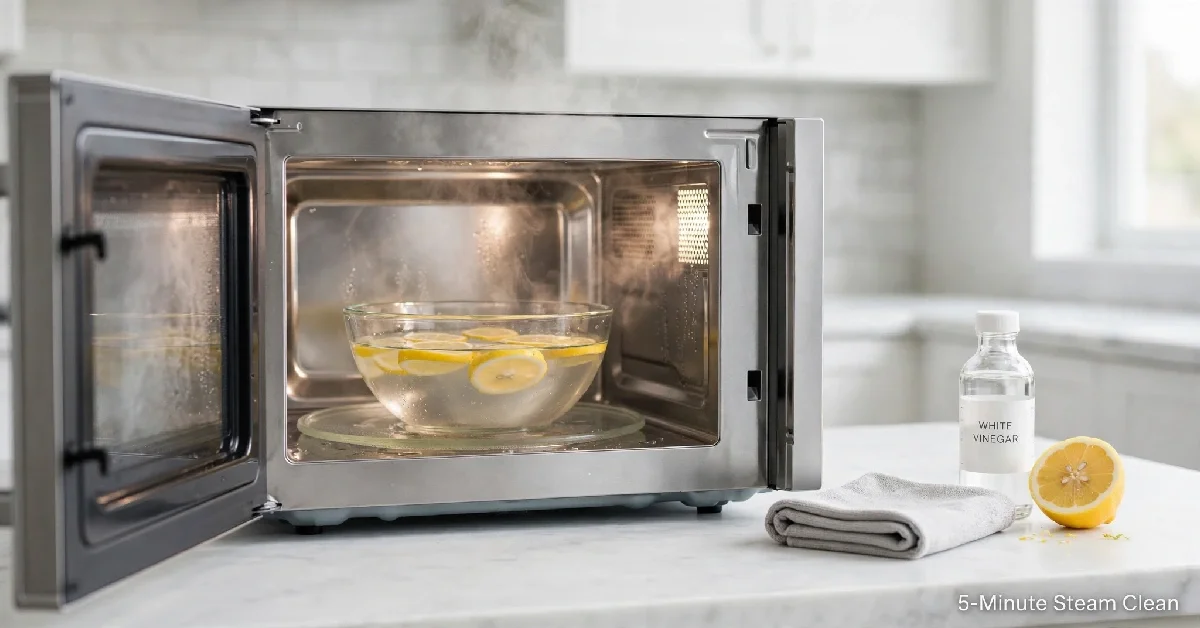
Your microwave is dirtier than you think. A 2024 study published in Frontiers in Microbiology found 747 different bacterial groups inside everyday microwaves, including pathogens like Klebsiella and Micrococcus. These can cause food poisoning and cross-contamination. But scrubbing with harsh chemicals takes time and leaves residue. There’s a faster way: steam cleaning with vinegar and water. It takes 5 minutes, uses three ingredients, and requires no scrubbing.
The method is backed by USDA guidelines and lab-tested for up to 99% residue removal. Here’s exactly how to do it, plus wattage adjustments, troubleshooting, and safety tips.
Key Takeaways
- 5-minute method: 2–3 minutes microwaving + 5 minutes steam dwell + 1 minute wiping.
- 3 ingredients: Water, white vinegar (or lemon), and a microwave-safe bowl.
- No scrubbing needed: Steam softens dried food and grease so it wipes away.
- Wattage matters: Adjust time based on your microwave’s power (700W–1200W+).
- Safety first: Never mix bleach and vinegar. Let the microwave cool before wiping.
Why a Quick Microwave Clean Matters (More Than You Think)
A dirty microwave isn’t just ugly. It’s a health risk. The 2024 study found that microwave interiors harbour diverse bacterial communities. Some of these bacteria can cause illness. Food splatters also cross-contaminate flavours. Your leftover curry will taste like fish if you don’t clean the interior.
A dirty microwave also wastes energy. Food residue and grease absorb microwaves. This means your food takes longer to heat. You use more electricity. A clean microwave runs more efficiently.
Regular cleaning prevents all of this. And the quick steam method makes it easy. You don’t need to scrub. You don’t need harsh chemicals. You just need 5 minutes.
What You Need (Supplies & Safety)
Gather these items before you start:
- A microwave-safe bowl (glass or ceramic, 2-cup capacity)
- 1 cup water
- 1–2 tablespoons white vinegar OR juice of ½ lemon
- A microfiber cloth
- Optional: a soft toothbrush for vents and crevices
Safety warnings:
- Never mix bleach and vinegar. This creates toxic chlorine gas.
- Never spray vinegar directly into the vents. Liquid can damage internal components.
- Allow the microwave to cool before wiping. The bowl and interior will be hot.
- Do not use abrasive scrubbers like steel wool. They scratch the interior coating.
The 5-Minute Steam Cleaning Method (Step-by-Step)
Step 1 — Prep the Microwave
Remove the glass turntable, roller ring, and any metal racks. Wash them separately in warm,m soapy water. Wipe loose food bits from the interior with a paper towel. This prevents them from turning into a bigger mess.
Step 2 — Mix the Steam Solution
In your microwave-safe bowl, combine 1 cup water with 1–2 tablespoons white vinegar. If you prefer lemon, use the juice of half a lemon (about ½ cup). Do not cover the bowl. You want the steam to escape and fill the microwave.
Step 3 — Microwave on High (2–3 Minutes)
Place the bowl in the centre of the microwave. Microwave on high until the water boils vigorously and the window fogs with steam. Wattage matters:
- 700W: 3–3.5 minutes
- 900W: 2.5–3 minutes
- 1000W: 2–2.5 minutes
- 1200W+: 2 minutes
If the window is clear after the suggested time, add 30-second increments until it fogs.
Step 4 — Let the Steam Dwell (5 Minutes)
Do not open the door. Let the steam sit inside for 5 minutes. For heavy buildup, wait 7–8 minutes. This is the key step. Opening early releases the humidity and loses the softening effect. The steam condenses on interior surfaces. It rehydrates dried food particles and grease. They become soft and easy to wipe away.
Step 5 — Wipe Clean
Carefully remove the bowl. It will be hot. Wipe the interior walls, ceiling, door, and floor with a damp microfiber cloth. For stubborn spots, sprinkle baking soda on a damp cloth and gently scrub. Wipe the rubber gaskets and waveguide cover gently. Never remove the waveguide cover. It protects the magnetron.
Wattage Timing Table (Adjust for Your Microwave)
| Wattage | Suggested Time | Target Observation |
|---|---|---|
| 700W | 3–3.5 min | Water boils vigorously; window fully fogged |
| 900W | 2.5–3 min | Active boil; condensation on door |
| 1000W | 2–2.5 min | Rapid boil; heavy fog |
| 1200W+ | 2 min | Vigorous boil; immediate fog |
If the window is clear after the suggested time, add 30-second increments until fogged.
Troubleshooting: Odours, Burnt-On Mess, and Hard Water Stains
Burnt-On Food or Cheese
Make a paste with baking soda and water. Apply it to the residue. Let it sit for 10 minutes. Gently scrub with a soft sponge. The paste lifts burnt particles without scratching.Persistent Odours (Fish, Onion, Burnt)
After the steam cycle, wipe the interior with a 50-50 water-vinegar solution. Leave a bowl of baking soda or coffee grounds inside overnight. They absorb lingering smells.
Hard Water Stains on Turntable
Soak the turntable in warm vinegar for 10 minutes. Then wash it with dish soap. Do not use abrasive scrubbers. They can scratch the glass.
DIY Steam Method vs. Commercial Steam Cleaners
| Factor | DIY (Bowl + Vinegar) | Commercial (Angry Mama, Duck) |
|---|---|---|
| Cost | ~$0.10 per clean | $8–$15 one-time |
| Effectiveness | 99% residue removal (GHI lab) | Similar; some add fun design |
| Ease | 3 min active | 3 min active; pre-measured |
| Safety | Requires hot bowl handling | Some include handles |
| Storage | None extra | Needs cabinet space |
The DIY method is cheaper and just as effective. Commercial steam cleaners are convenient but not necessary. If you already own one, use it. If not, save your money.
How to Keep Your Microwave Clean Longer
- Cover food with a splatter cover or damp paper towel. This catches grease and sauce.
- Wipe spills immediately with a damp cloth. Don’t let them bake on.
- Deep steam clean once a week if you use your microwave daily. Every 2 weeks for occasional use.
- Leave the door ajar after use. This airs out moisture and prevents odours.
Conclusion + Quick Checklist
You don’t need harsh chemicals or elbow grease to clean your microwave. Steam, vinegar, and 5 minutes are enough. This method removes up to 99% of residue, kills odour-causing bacteria, and keeps your microwave running efficiently.
Quick checklist:
- [ ] Microwave-safe bowl
- [ ] 1 cup water
- [ ] 1–2 tbsp white vinegar (or ½ cup lemon juice)
- [ ] Microwave on high for 2–3 minutes
- [ ] Let steam dwell 5 minutes (door closed)
- [ ] Wipe with damp microfiber cloth
- [ ] Never mix bleach and vinegar
Try it today. Your microwave—and your next reheated meal—will thank you. For stubborn burnt-on messes, follow up with a baking soda paste. Learn more in our troubleshooting section.
FAQs
How long does the quick microwave cleaning method take?
Total active time is about 3 minutes. Passive steam time is 5 minutes. The entire process takes under 10 minutes.
Can I use lemon instead of vinegar?
Yes. Use the juice of half a lemon (about ½ cup) in 1 cup of water. Citric acid works similarly to acetic acid to break down grease and neutralise odours.
Is vinegar steam safe for my microwave?
Yes, diluted vinegar steam is safe for microwave interiors. Never mix vinegar with bleach—this creates toxic chlorine gas.
How often should I steam clean my microwave?
Once a week for daily users. For occasional use, every 2 weeks. Wipe spills immediately to extend time between deep cleans.
What if the steam doesn’t remove burnt-on food?
Make a baking soda paste (baking soda + water). Apply to the spot, let it sit for 10 minutes, then gently scrub with a soft sponge.
Do I need to remove the turntable before cleaning?
A: Yes. Remove the glass turntable and roller ring and wash them separately in warm, soapy water. Let the turntable cool before washing to prevent cracking.
Can I clean the microwave with just water?
Yes, water alone creates steam that loosens residue. However, vinegar or lemon adds degreasing and odour-neutralising benefits.
Is it safe to microwave a sponge to clean it?
Yes, if the sponge is completely wet and contains no metal. Microwave on high for 1–2 minutes. This kills up to 99.99999% of sponge bacteria. Never microwave a dry sponge—fire risk.